Since first cleaning and fixing the Mac, it has been getting progressively worse with the display issue. Initially it was kind of OK, but as time went on it was getting really bad. Here is where we go to last time on the repair, and it worked for a while… Probably just luck in retrospect!
It is time to open it up again and have another go. When we left it before, there were some areas of the display board that were sensitive to a gentle tap. I really thought it was a dry joint causing the intermittent issue, and then it was done before it worked well enough. Let’s take another look and tap around it to see if anything has changed.
There were some marks where the board was sensitive to a gentle tap. It was more or less the same here, just MUCH worse, the screen mostly blank this time. To help in the diagnostics, I took a high-res image of the board and searched through that. My head mounted magnifier it is not great and the high-power mag fell off! That means I don’t have much magnification with them. Also, it is good to just use a picture as this can be zoomed in without straining your neck!
Here is what I found:
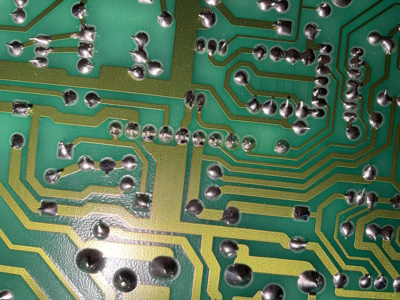
Interesting. That right-hand solder joint seems to be on a connector! Ah! That is so obvious now. As this connector has been plugged and unplugged over the years, it would be the main candidate for a mechanically stressed joint. You can see the cable running up from the logic board in the centre of the image:
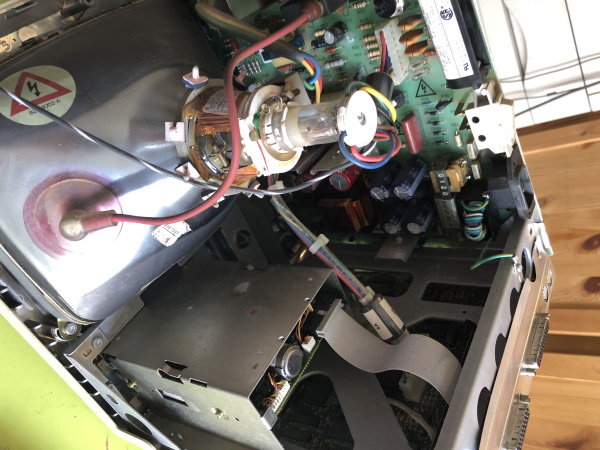
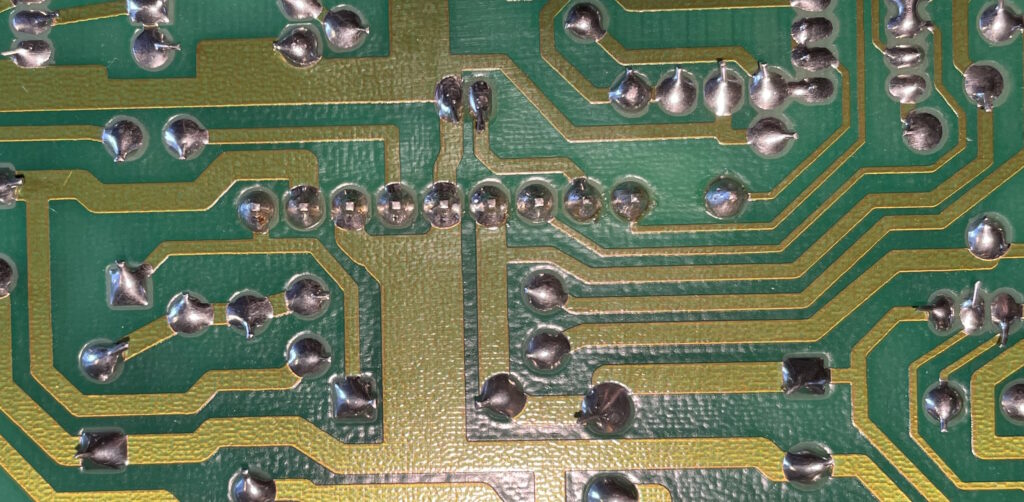
Here is a closer look, hidden behind the neck of the tube:
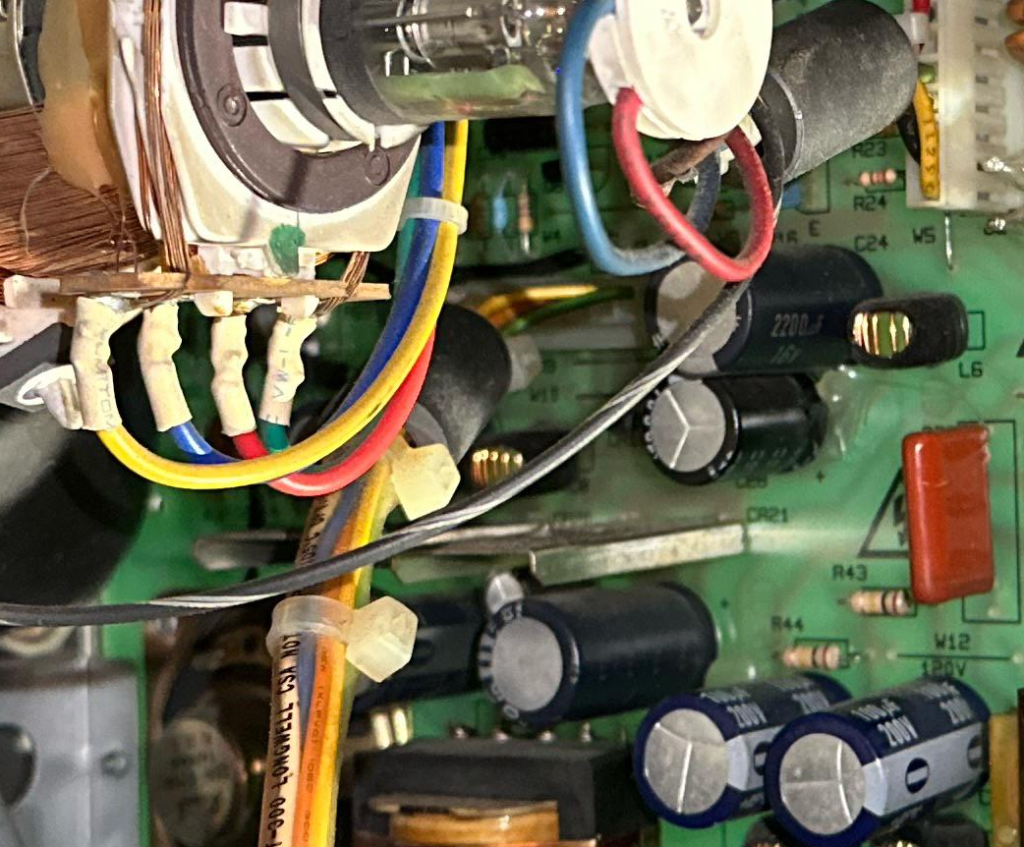
So that carries the video signal to the display board and the supply voltage levels back to the logic board. From the other side, let’s zoom right in and you can ‘clearly’ see it:
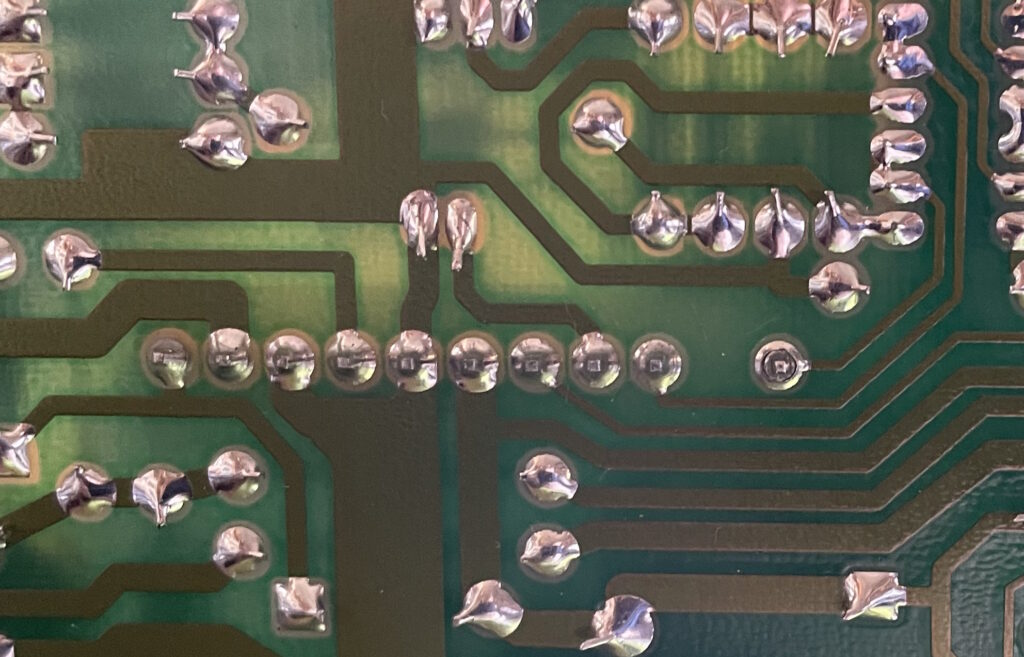
It is not that visible with the naked eye, or indeed my magnifiers, but with a photo there is obviously something there, especially after a gentle wiggle of the connector.
Lets reflow all the solder joints:
Then clean up the flux on the board that get sprayed around.
Switch it on and test:

Seems good so far… In fact, after a week of regular use, it was still rock solid! RESULT!
As an aside, the above application is Photoshop 2, in glorious mono! Here is an article about Photoshop on the Mac. You can smell the 90s…
Notes
An obvious takeaway here is to focus on the connectors when looking for a dry joint. If, as I suspect here, the cable has been plugged in and out a few times (before I got the unit) it may have been pulled or rocked back and forth a lot to get it out. These type of connectors have a catch on them to keep them in place which is great, but can be tricky to remove, requiring you to prise the catch open to remove it. I am not saying I have not put unreasonable force on these things in the past when they do not play nicely but, in this case at least, there has been a price to pay.
I suggest the following (mostly for my own edification)
- Pay extra attention to connectors for dry-joints since they may have come under mechanical stress which can crack the joint
- Remove connectors carefully and try not to get annoyed
- Use a good pair of magnifiers to examine the state of the joints
- Test the continuity where possible, but this can be misleading. You may need to use a resistance mode and adjust the OHM range to get a better picture of what is going on. A connector may have a common connection elsewhere in the circuit, giving you a false picture of what is going on
- Clean up your flux after if you reflow the solder joints
I should probably print out the above list and refer to it each time I examine a board… Patience is a virtue here.